CREATING A SERVER
USING UBUNTU 14.04
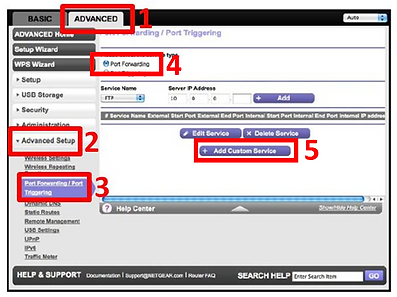
Instruction 1
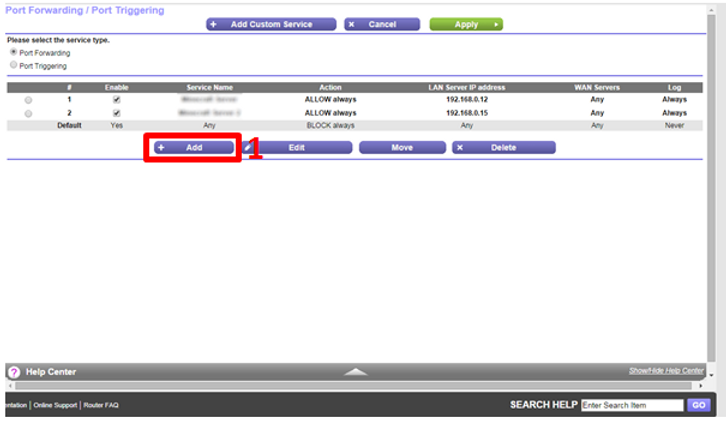
Type the IPv4 address of your router/modem into the address bar of your browser (in most cases the IPv4 address is 192.168.0.1) to enter your router/modem, then type the username and password if you are prompted, and click the 'Advanced' tab. Now, follow the visual instructions to the right and below, in that order.
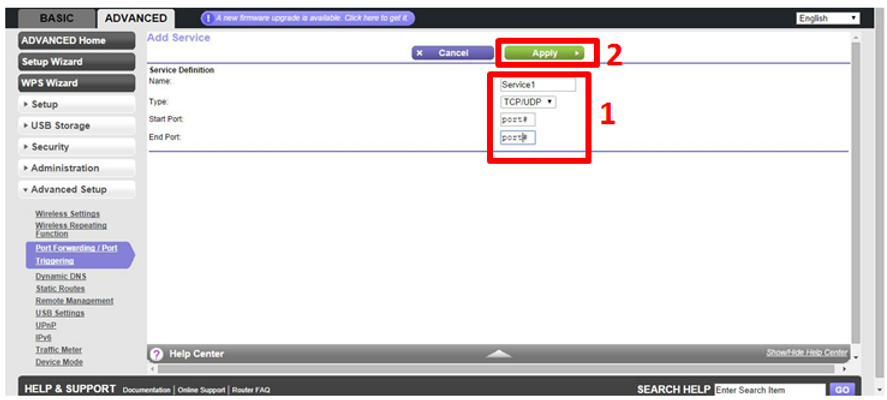
Instruction 2
Replace 'Service1' with a two or three word description, like 'FTP Server' or 'Web Server' or 'Game Server'. You can also replace 'port#' with the desired port number. There are some ports that are traditionally used for file sharing, web and game servers, so it would be a good idea to research those so when users want to connect to your server, they don't have to enter a custom port number. Once you've clicked apply, you'll be taken back to this page:
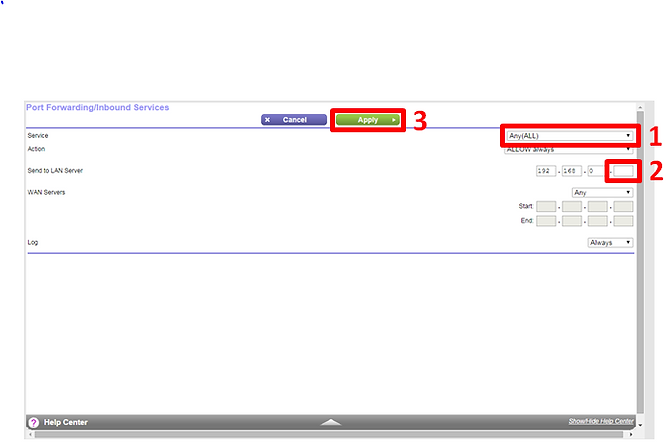
Instruction 3
-
Change the service dropdown menu to the service you made earlier, described with two or three words such as 'FTP Server' or Web Server' or Game Server'.
-
Change the last two digits of the IPv4 address to match the reserved address you made earlier. For example, if you reserved the IPv4 address '192.168.0.15.
If you have completed the 'Reserving an IPv4 Address' and 'Port Forwarding' correctly, your server is now port forwarded and almost ready to use.
Port Forwarding
Often overlooked, this step can cause much frustration when your server doesn't work. That's why Port-Forwarding is the most crucial part of setting up a server, regardless of if you run the server off Windows, Mac OSX or a distribution of Linux. What happens when you Port Forward is a port is assigned to the server machine which allows the server to access and distribute its service over the internet. A port is like a door, and port forwarding is like opening it. If you use a router or modem with an in-built firewall (most routers/modems do these days), this step will be a lot easier.